Creating an Electron application from scratch


Electron applications can contain a lot of features, so it makes the most sense if you are new (or need a refresher) to the framework and desire to build an application, the best way to do that is to build the application from scratch. I have found front-end development has implicit biases in choices of which languages and frameworks are used (with viable alternatives built every day); we will be choosing popular options of the day (Webpack and React) in order to build our Electron application.
Creating the folder structure
Everyone has their own opinion when it comes to a folder structure for an application. Think about what best suits your needs, but don't get caught on the structure needing to be perfect; good enough will do. Go ahead and create these folders on your computer.
[project]
	app/                 // Application-level code goes here
	dist/                // The bundled application/artifacts go here
	docs/                // Documentation
	node_modules/        // Where node modules will be saved
	resources/           // Icons, favicons, etc.
	test/                // Project for unit tests
	package.json
	config files
	readme
The folder structure for an Electron application
Install the LTS (long-term support) version of Node from here if node -v doesn't give you sensible output on your computer's terminal/console. (Tip: there is a minimum version of Node required for each Electron framework version! If you haven't updated Node in a while, now would be a good time to do so.)
PS C:\Users\zachary> node -v
v16.13.0
How to check the version of Node on your computer
Installing Node also installs npm, which we will also need shortly.
LTS is a company's promise to keep versions of their software/service up to date and provide security fixes or support. Continually reviewing and using the latest LTS version is important for the security and performance of your application. To read about Node's LTS schedule, check out this page.
If this is a hobby project, feel free to ignore this if you so choose!
Now, open up your favorite text editor or IDE. I will be using Visual Studio Code, but there are plenty of examples if you have your own favorite. A nice feature about VSCode is that it has extensions which if you haven't heard before are add-ons that can provide helpful functionality such as formatters, syntax highlighters, linters or more. These extensions can help with productivity, greater accuracy and more consistent code if you so choose to use them.
Creating the project with npm
An Electron application is an npm project with the electron package as a dependency. Our first steps will be creating the npm project and adding the necessary dependencies to get us started.
Run npm init -y in the [project] level directory in order to create our application. The -y flag automatically answers yes to the questions npm init would ask you on the command line. We are going to skip the prompts in the console and enter in the information manually. npm init -y should give the following file as a result.
PS C:\Users\zachary\source\repos\simple-electron-template> npm init -yCreating the npm project with default values
package.json
{
  "name": "simple-electron-template",
  "version": "1.0.0",
  "description": "",
  "main": "index.js",
  "directories": {
    "doc": "docs",
    "test": "test"
  },
  "scripts": {
    "test": "echo \"Error: no test specified\" && exit 1"
  },
  "keywords": [],
  "author": "",
  "license": "ISC"
}
The default contents of npm init -y
There are a lot of options in the package.json, but we will modify and explain them as we need. The first change we will make is adding the "private" property to our package.json; setting this value to true prevents us from accidentally publishing our project to npm. I also recommend changing the "version" to 0.0.1 to indicate that the project isn't yet public-worthy (and when it is, the version should be 1.0.0).
package.json
{
  "name": "simple-electron-template",
  "version": "0.0.1",
  "description": "",
  "main": "index.js",
  "private": true,
  "directories": {
    "doc": "docs",
    "test": "test"
  },
  "scripts": {
    "test": "echo \"Error: no test specified\" && exit 1"
  },
  "keywords": [],
  "author": "",
  "license": "ISC"
}
Add the private property so we don't accidentally publish our project
Install Electron from npm by running npm i electron --save-dev. In npm, dependencies can be dependencies or they can be dev dependencies. The distinction between the two is that dev dependencies are not bundled in the output of your project (which reduces the file size of your application). Typical dev dependencies are javascript or css bundlers, linters, or in our case, the framework itself. We will use a bundler to include what we need in the project, so we install Electron with the --save-dev flag which sets our dependency as a devDependency.
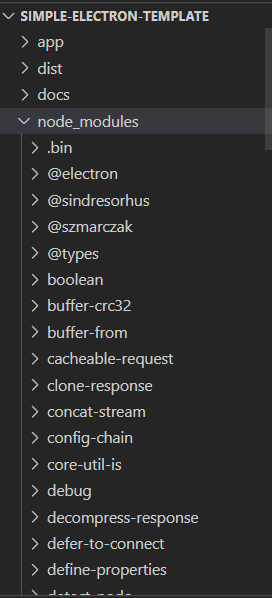
Create a .gitignore file in your [project] directory as well. I assume that you'll be saving this in source control; you'll want to make sure that all of the node_modules files that were added by running npm i electron --save-dev aren't saved in source control (because they can easily be regenerated at any time by running npm i).
You should steal from this example and use this as your .gitignore file.
.gitignore
# Logs
logs
*.log
npm-debug.log*
yarn-debug.log*
yarn-error.log*
lerna-debug.log*
.pnpm-debug.log*

# Diagnostic reports (https://nodejs.org/api/report.html)
report.[0-9]*.[0-9]*.[0-9]*.[0-9]*.json

# Runtime data
pids
*.pid
*.seed
*.pid.lock

# Directory for instrumented libs generated by jscoverage/JSCover
lib-cov

# Coverage directory used by tools like istanbul
coverage
*.lcov

# nyc test coverage
.nyc_output

# Grunt intermediate storage (https://gruntjs.com/creating-plugins#storing-task-files)
.grunt

# Bower dependency directory (https://bower.io/)
bower_components

# node-waf configuration
.lock-wscript

# Compiled binary addons (https://nodejs.org/api/addons.html)
build/Release

# Dependency directories
node_modules/
jspm_packages/

# Snowpack dependency directory (https://snowpack.dev/)
web_modules/

# TypeScript cache
*.tsbuildinfo

# Optional npm cache directory
.npm

# Optional eslint cache
.eslintcache

# Optional stylelint cache
.stylelintcache

# Microbundle cache
.rpt2_cache/
.rts2_cache_cjs/
.rts2_cache_es/
.rts2_cache_umd/

# Optional REPL history
.node_repl_history

# Output of 'npm pack'
*.tgz

# Yarn Integrity file
.yarn-integrity

# dotenv environment variable files
.env
.env.development.local
.env.test.local
.env.production.local
.env.local

# parcel-bundler cache (https://parceljs.org/)
.cache
.parcel-cache

# Next.js build output
.next
out

# Nuxt.js build / generate output
.nuxt
dist

# Gatsby files
.cache/
# Comment in the public line in if your project uses Gatsby and not Next.js
# https://nextjs.org/blog/next-9-1#public-directory-support
# public

# vuepress build output
.vuepress/dist

# vuepress v2.x temp and cache directory
.temp
.cache

# Docusaurus cache and generated files
.docusaurus

# Serverless directories
.serverless/

# FuseBox cache
.fusebox/

# DynamoDB Local files
.dynamodb/

# TernJS port file
.tern-port

# Stores VSCode versions used for testing VSCode extensions
.vscode-test

# yarn v2
.yarn/cache
.yarn/unplugged
.yarn/build-state.yml
.yarn/install-state.gz
.pnp.*
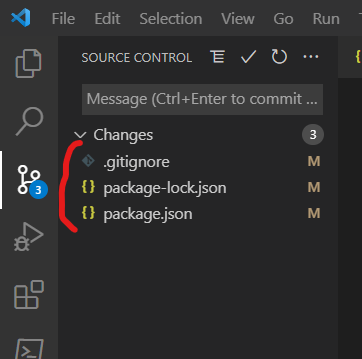
Once you add the .gitignore file, you'll notice that the number of files that are eligible to be pushed to your remote repository are greatly reduced.
Configure Electron
We now have our project in a state where we are ready to start writing code. For a clear separation in our file structure, go and create additional folders under [project]/app/
[project]
	app/
		electron/             // Will hold electron-specific files
		src/                  // Will hold other javascript files
	dist/
	docs/
	// ... rest of folders
Creating subfolders to separate electron from non-electron files
Create our Electron main script here.
[project]
	app/
		electron/
			main.js
		src/
	dist/
	docs/
	// ... rest of folders
Creating subfolders to separate electron from non-electron files
As a reminder, the main script is responsible for creating a renderer process (which is our UI). Creating the renderer process is done by instantiating a BrowserWindow.
main.js
const { BrowserWindow } = require("electron");

// Create a new window
let window = new BrowserWindow({
    width: 800,
    height: 600
});
Create a new BrowserWindow
Unfortunately, the above code does not work, as BrowserWindows are only able to be created once the Electron application has finished starting up. To start the Electron application, we need to import app.
main.js
const {
    app,
    BrowserWindow
} = require("electron");

// This method is called when Electron
// has finished initializing
app.whenReady().then(() => {

    // Create a new window
    let window = new BrowserWindow({
        width: 800,
        height: 600
    });
});
Creating a BrowserWindow after Electron has finished initializing
This code technically works, but only after we modify the "main" property of the package.json. The "main" property is pointing to a non-existent file, let's change it to point to our main.js file.
package.json
{
  "name": "simple-electron-template",
  "version": "0.0.1",
  "description": "",
  "main": "app/electron/main.js",
  "private": true,
  "directories": {
    "doc": "docs",
    "test": "test"
  },
  "scripts": {
    "test": "echo \"Error: no test specified\" && exit 1"
  },
  "keywords": [],
  "author": "",
  "license": "ISC",
  "devDependencies": {
    "electron": "^16.0.8"
  }
}
We've updated the "main" property to point to our main.js file
If we now run electron . (which starts electron at the current path "."), we can see the fruit of our labor.
PS C:\Users\zachary\source\repos\simple-electron-template> electron .This command starts our Electron application
Creating a view
BrowserWindows by default show no content. In order to show content, we need to create an HTML file and load it into the BrowserWindow. Let's create a file named index.html in our [project] directory with the following HTML boilerplate.
index.html
<!DOCTYPE html>
<html lang="en-US">
    <head>
        <title>My app</title>
        <meta charset="utf-8" />
    </head>
    <body>
        <div>Hello world</div>
    </body>
</html>
Standard boilerplate for an HTML file
Our main.js file needs to be modified in order to load this HTML file.
main.js
const {
    app,
    BrowserWindow
} = require("electron");

// This method is called when Electron
// has finished initializing
app.whenReady().then(() => {

    // Create a new window
    let window = new BrowserWindow({
        width: 800,
        height: 600
    });

    // Load our HTML file
    window.loadFile("index.html");
});
Loading our new HTML file
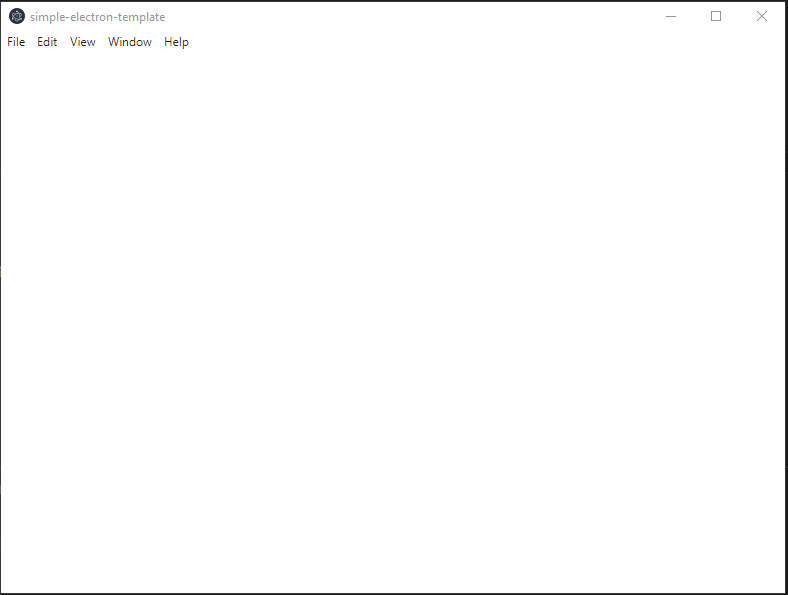
If we run electron . again, we will see our HTML page in our app!
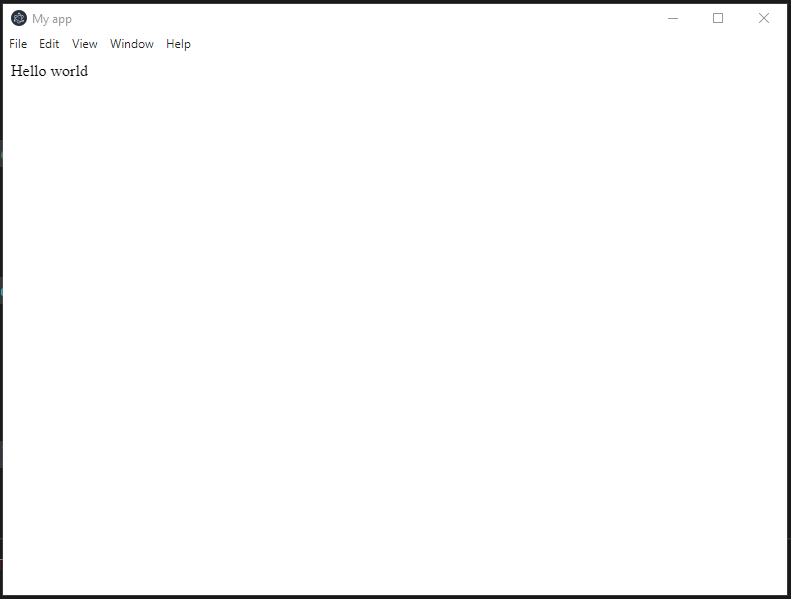
Did you notice the delay, a white screen, before the "Hello world" displayed within your app? If we want to build a quality application, we should pay attention to these small details and fix them as they arise. There is a way in which we can remedy this "loading screen" for our app - set the "show" property to false on the BrowserWindow. We will also need to show the BrowserWindow when the BrowserWindow has finished loading; be sure to add this event handler.
main.js
const {
    app,
    BrowserWindow
} = require("electron");

// This method is called when Electron
// has finished initializing
app.whenReady().then(() => {

    // Create a new window
    let window = new BrowserWindow({
        width: 800,
        height: 600,
        show: false
    });

    // Event listeners on the window
    window.webContents.on("did-finish-load", () => {
        window.show();
        window.focus();
    });

    // Load our HTML file
    window.loadFile("index.html");
});
With these changes, our renderer's HTML will be visible without any white screen flicker.
Now is a good time to call out and explain webContents. WebContents is a property on the BrowserWindow that can listen/respond to HTML events. We can listen for "dom-ready", "devtools-opened", "media-paused" or any of the other supported events. WebContents is an event emitter and has access to methods such as .on and .off in order to listen and respond to an event.
Recommended lifecycle events
You would likely not recognize it, unless you started extensively testing your application in different environments, of a few environment-specific events that should be configured. These events are taken from the electron quick start repository. Let's add this additional code so that our Electron app behaves more consistently on other user's operating systems.
main.js
const {
    app,
    BrowserWindow
} = require("electron");

function createWindow() {
    // Create a new window
    const window = new BrowserWindow({
        width: 800,
        height: 600,
        show: false
    });

    // Event listeners on the window
    window.webContents.on("did-finish-load", () => {
        window.show();
        window.focus();
    });

    // Load our HTML file
    window.loadFile("index.html");
}

// This method is called when Electron
// has finished initializing
app.whenReady().then(() => {
    createWindow();

    app.on("activate", () => {
        // On macOS it's common to re-create a window in the app when the
        // dock icon is clicked and there are no other windows open.
        if (BrowserWindow.getAllWindows().length === 0) {
            createWindow();
        }
    });
});

// Quit when all windows are closed, except on macOS. There, it's common
// for applications and their menu bar to stay active until the user quits
// explicitly with Cmd + Q.
app.on("window-all-closed", function () {
    if (process.platform !== "darwin") {
        app.quit();
    }
});
We've added common lifecycle events from the Electron quickstart repository
We've modifed our main.js file to encapsulate creating the BrowserWindow into a function since there are now a few locations where we may be creating a new BrowserWindow. We have also changed the BrowserWindow to a type of const instead of let since the BrowserWindow value will not change.
Create the UI
Electron can support any front-end Javascript framework. Electron can support Vue, React, Preact, Angular, or even Imba; for our example we will choose React as it is a popular framework today.
Setting up React
Installing React in our Electron app can be done by running this command.
PS C:\Users\zachary\source\repos\simple-electron-template> npm i react react-domInstalling React in our app
React applications need an entry point, a place where root.render (where the React-rendered UI is inserted into the DOM) is called. We will create our entry point in the app/src folder and populate this file with common React boilerplate.
app/src/index.jsx
import React from "react";
import { createRoot } from "react-dom/client";

const container = document.getElementById("target");
const root = createRoot(container);

root.render(<React.Fragment>Hello world</React.Fragment>);
React skeleton code
Unfortunately, we can't test to see React working in our application because our Electron app (the Chromium browser) doesn't understand what a .jsx file is or what to do with it. In order for Electron to correctly render jsx (React), we need to include a transpiler that's going to turn the .jsx into .js, which is what Electron can render.
Set up Webpack
For those who are not familiar, Webpack is a static module bundler for Javascript applications. Webpack has the ability to turn our .jsx files into .js files and allow us to use React (or other front-end frameworks) in our Electron app. To get started with Webpack, install it with the following command.
PS C:\Users\zachary\source\repos\simple-electron-template> npm i webpack webpack-cli --save-devInstalling webpack for our application
Webpack is commonly driven off of a config file (even though since version 4, a configuration file is not required); let's create a webpack.config.js file in the root of our project.
Webpack has a concept of an entry point, which is where Webpack starts looking for dependencies that it then bundles together. Our entry point of our Electron application is the index.jsx file that we just created. Let's configure our entry point in our Webpack config file.
webpack.config.js
module.exports = {
    entry: "./app/src/index.jsx"
};
Defining our entry point
An entry point does nothing by itself if we do not get the transpiled files! In order to set where Webpack outputs the altered files, we need to update the output property in the configuration.
webpack.config.js
const path = require("path");

module.exports = {
    entry: "./app/src/index.jsx",
    output: {
        path: path.resolve(__dirname, "app/dist"),
        filename: "bundle.js"
    },
};
Defining an entry and output path for Webpack
In this example, we are outputing the files in our app/dist directory. The file that is created by Webpack will be named bundle.js.
By default, Webpack does not support .jsx, so we need to make use of a loader that has the ability to load [and process] .jsx files. The loader we will be using is babel-loader. Install this by running the command below.
PS C:\Users\zachary\source\repos\simple-electron-template> npm i babel-loader --save-devInstall the babel loader
In order to set up the babel loader, we need to add a "module.rules" property in our webpack config. Within the "rules" property, we can define that for .jsx files, Webpack should use the babel-loader. Let's make these changes to our webpack.config.js file.
webpack.config.js
const path = require("path");

module.exports = {
    entry: "./app/src/index.jsx",
    output: {
        path: path.resolve(__dirname, "app/dist"),
        filename: "bundle.js"
    },
    module: {
        rules: [
            // loads .js/jsx/json files
            {
                test: /\.jsx?$/,
                include: [path.resolve(__dirname, "app/src")],
                loader: "babel-loader",
                resolve: {
                    extensions: [".js", ".jsx", ".json"]
                }
            }
        ]
    }
};
Adding babel-loader to load .js/jsx/json files
In addition to supporting .jsx files, babel-loader also supports .js and .json files. We may include .js and .json files in our application, so lets prepare ahead and add those extensions in the "extensions" property in our configuration file so that Webpack is able to load them with babel-loader.
Unfortunately, babel-loader by itself won't actually transpile .jsx files to .js files. For the actual transpiling we will need @babel/core and a few presets. Install the additional dependencies to our growing list of devDependencies.
PS C:\Users\zachary\source\repos\simple-electron-template> npm i @babel/core @babel/preset-env @babel/preset-reactInstalling all of the rest of our dependencies to transpile .jsx files to .js files
Again, the unfortunate world of Javascript on the front-end is a myriad of tools we need to bring in sync. In order that our presets are used when Webpack uses Babel to bundle modules, we need to create a configuration file for Babel. There are many options to solve for this, but we will create a .babelrc file in our project root. In this new file, we will define our presets that Babel should use.
.babelrc
{
    "presets": [
        "@babel/preset-env",
        "@babel/preset-react"
    ]
}
Defining the presets for our Electron application
We are finally ready to convert .jsx files into a .js file! Let's update our npm scripts so that we are able to call webpack more easily.
package.json
{
  "name": "simple-electron-template",
  "version": "0.0.1",
  "description": "",
  "main": "app/electron/main.js",
  "private": true,
  "directories": {
    "doc": "docs",
    "test": "test"
  },
  "devDependencies": {
    "babel-loader": "^8.2.5",
    "electron": "^19.0.8",
    "webpack": "^5.73.0",
    "webpack-cli": "^4.10.0"
  },
  "scripts": {
    "dev": "webpack --mode development --config ./webpack.config.js"
  },
  "keywords": [],
  "author": "",
  "license": "ISC",
  "dependencies": {
    "@babel/core": "^7.18.6",
    "@babel/preset-env": "^7.18.6",
    "@babel/preset-react": "^7.18.6",
    "react": "^18.2.0",
    "react-dom": "^18.2.0"
  }
}
Added a script to call webpack and bundle our files
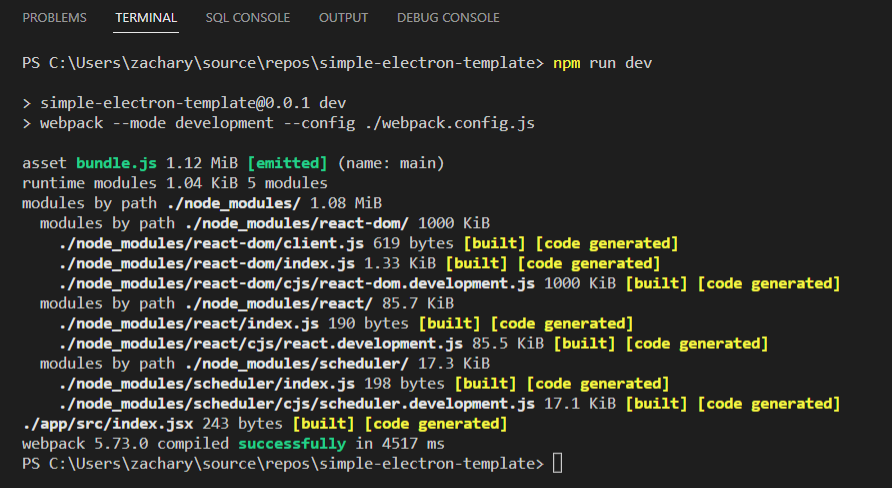
Run the following command and then check out app/dist for the new bundle.js file that was created (this is our React code)!
PS C:\Users\zachary\source\repos\simple-electron-template> npm run devRuns webpack and transpiles our React code into Javascript code
Bundling React doesn't actually change our application, we are still loading our Hello world page if we run electron .. In order for our React code to be injected into our HTML page, we need to add a Webpack loader for .html files. Install html-loader with the below command.
PS C:\Users\zachary\source\repos\simple-electron-template> npm i html-loader --save-devInstalling a loader so that Webpack can load .html files
Modify the webpack config to use the html-loader for .html files.
webpack.config.js
const path = require("path");

module.exports = {
    entry: "./app/src/index.jsx",
    output: {
        path: path.resolve(__dirname, "app/dist"),
        filename: "bundle.js"
    },
    module: {
        rules: [
            // loads .js/jsx files
            {
                test: /\.jsx?$/,
                include: [path.resolve(__dirname, "app/src")],
                loader: "babel-loader",
                resolve: {
                    extensions: [".js", ".jsx", ".json"]
                }
            },
            {
                // loads .html files
                test: /\.(html)$/,
                include: [path.resolve(__dirname, "app/src")],
                use: {
                    loader: "html-loader"
                }
            }
        ]
    }
};
Webpack can now load html files
In a similar situation like babel-loader, the existence of html-loader in our webpack configuration file only gets us half-way. In our application, we not only need to load our .html file, but we need our transpiled Javascript to be included in the .html file. Webpack itself is unable to support this scenario, but a Webpack plugin can; html-webpack-plugin. Install this with the below command.
PS C:\Users\zachary\source\repos\simple-electron-template> npm i html-webpack-plugin --save-devInstalling html-webpack-plugin
Plugins in Webpack are added on the "plugins" property. Let's add the plugin to our configuration file.
webpack.config.js
const HtmlWebpackPlugin = require("html-webpack-plugin");
const path = require("path");

module.exports = {
    entry: "./app/src/index.jsx",
    output: {
        path: path.resolve(__dirname, "app/dist"),
        filename: "bundle.js"
    },
    module: {
        rules: [
            // loads .js/jsx/json files
            {
                test: /\.jsx?$/,
                include: [path.resolve(__dirname, "app/src")],
                loader: "babel-loader",
                resolve: {
                    extensions: [".js", ".jsx", ".json"]
                }
            },
            {
                // loads .html files
                test: /\.(html)$/,
                include: [path.resolve(__dirname, "app/src")],
                use: {
                    loader: "html-loader"
                }
            }
        ]
    },
    plugins: [
        new HtmlWebpackPlugin({
            template: path.resolve(__dirname, "index.html"),
            filename: "index.html"
        })
    ]
};
Adding the HtmlWebpackPlugin to inject our bundled script in the .html file
Running npm run dev at this point will generate an index.html (the "filename" property above) in our app/dist directory.
Opening app/dist/index.html gives us the following content; notice that our bundled Javascript has been injected into the HTML file.
app/dist/index.html
<!DOCTYPE html>
<html lang="en-US">
    <head>
        <title>My app</title>
        <meta charset="utf-8" />
    <script defer src="bundle.js"></script></head>
    <body>
        <div>Hello world</div>
    </body>
</html>
Our generated .html file outputted from Webpack
We have verified that webpack is functioning properly; let's change our Electron application to use our Webpack-bundled file. Update app/electron/main.js with the following changes.
app/electron/main.js
// Load our HTML file
window.loadFile("app/dist/index.html");
Load the bundled index.html file
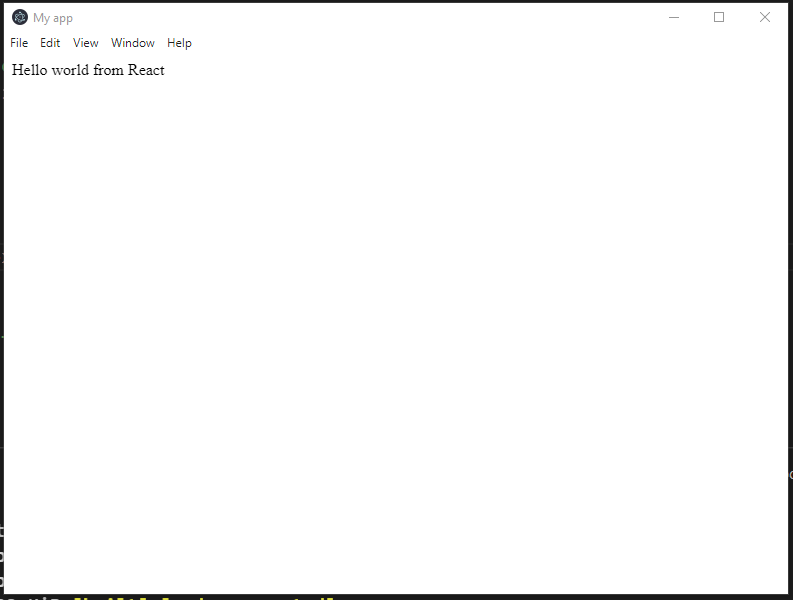
Make a small change to index.jsx so that we are sure React is working as expected.
app/src/index.jsx
import React from "react";
import { createRoot } from "react-dom/client";
const container = document.getElementById("target");
const root = createRoot(container);
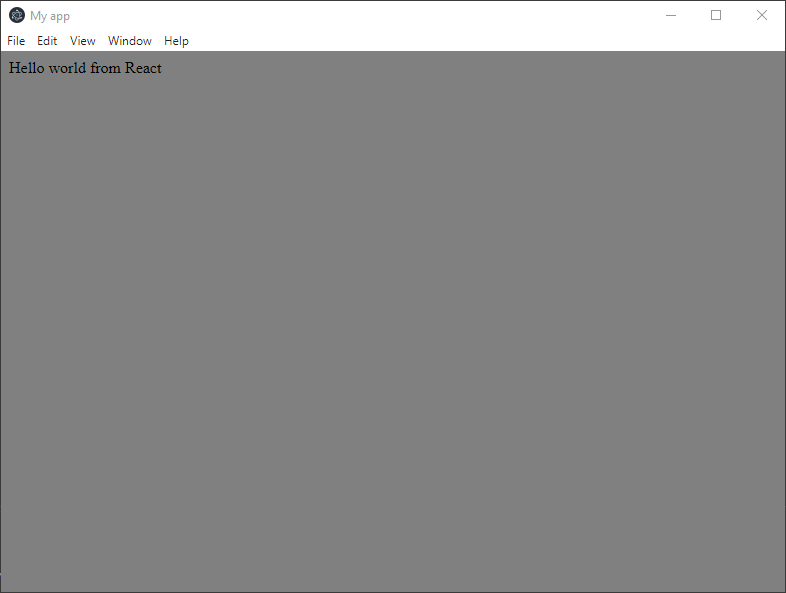
root.render(<React.Fragment>Hello world from React</React.Fragment>);Added "from React" to our index.jsx file
As a reminder, root.render injects a React object into the DOM. Our code is currently looking for an HTML element with an id of "target" (ie. document.getElementById("target")); we will need to change our index.html file to add this HTML element.
index.html
<!DOCTYPE html>
<html lang="en-US">
    <head>
        <title>My app</title>
        <meta charset="utf-8" />
    </head>
    <body id="target">
    </body>
</html>
Creating the DOM element for React to inject into
Run npm run dev to run Webpack, and then run electron . to start our app. We will see we've added React to our Electron app successfully!
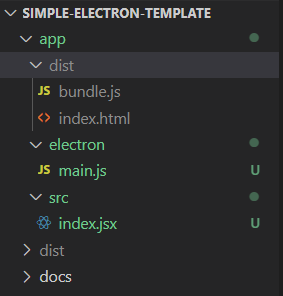
Now that our index.html file is being processed by Webpack, I prefer to move the index.html file to the app/src directory in order to keep similar files together (to leave configuration files at the project root, and keep source files in the src directory).
Move index.html to app/src/index.html. Make the below changes to webpack.config.js.
webpack.config.js
plugins: [
    new HtmlWebpackPlugin({
        template: path.resolve(__dirname, "app/src/index.html"),
        filename: "index.html"
    })
]
Double-check that everything is still working by running npm run dev followed by electron ..
Add CSS to the project
It's highly likely that you'll want to style the pages you create, and for that, we will need to support CSS in our Electron app. Create app/src/index.css with the following contents.
app/src/index.css
html,
body {
    background-color: #808080;
}
A base css file for our application
Import this css file in index.jsx
app/src/index.jsx
import React from "react";
import { createRoot } from "react-dom/client";

import "./index.css";

const container = document.getElementById("target");
const root = createRoot(container);

root.render(<React.Fragment>Hello world from React</React.Fragment>);
Injecting base CSS into our app
If we run npm run dev at this point, we will encounter an error ("Module parse failed: Unexpected token.").
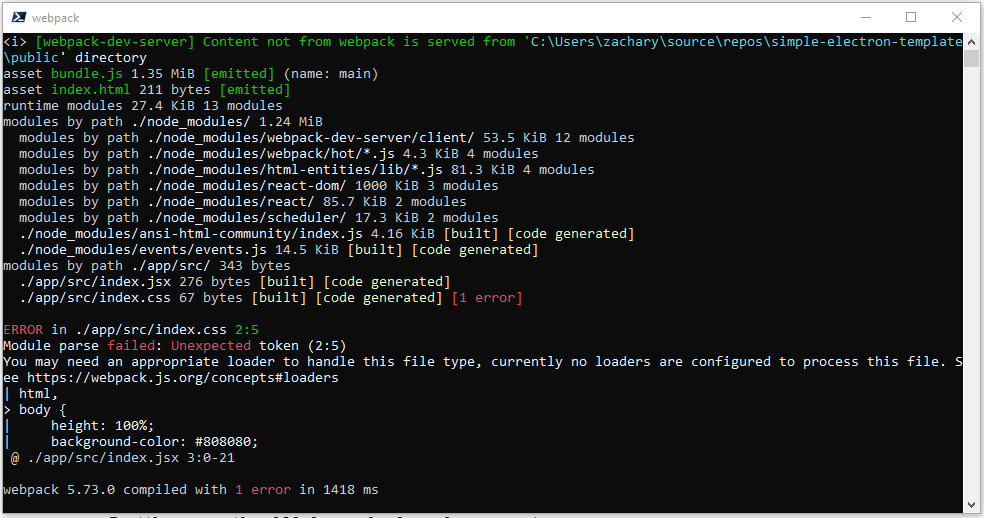
Webpack, by default, does not know how to process CSS files. In order to inject this CSS into our webpage, we need an additional two loaders configured in our Webpack config; style-loader and css-loader. Install both of them by running npm i style-loader css-loader --save-dev.
Modify the webpack.config.js to include these loaders.
webpack.config.js
const HtmlWebpackPlugin = require("html-webpack-plugin");
const path = require("path");

module.exports = {
    entry: "./app/src/index.jsx",
    output: {
        path: path.resolve(__dirname, "app/dist"),
        filename: "bundle.js"
    },
    module: {
        rules: [
            // loads .js/jsx/json files
            {
                test: /\.jsx?$/,
                include: [path.resolve(__dirname, "app/src")],
                loader: "babel-loader",
                resolve: {
                    extensions: [".js", ".jsx", ".json"]
                }
            },
            {
                // loads .html files
                test: /\.(html)$/,
                include: [path.resolve(__dirname, "app/src")],
                use: {
                    loader: "html-loader"
                }
            },
            {
                // loads .css files
                test: /\.css$/,
                include: [path.resolve(__dirname, "app/src")],
                use: [
                    "style-loader",
                    "css-loader"
                ]
            }
        ]
    },
    plugins: [
        new HtmlWebpackPlugin({
            template: path.resolve(__dirname, "app/src/index.html"),
            filename: "index.html"
        })
    ]
};
Adding two additional loaders to inject CSS into our application
css-loader loads CSS files and style-loader injects those styles into the HTML. Now that these loaders are in place, running npm run dev should result in a success message from Webpack.
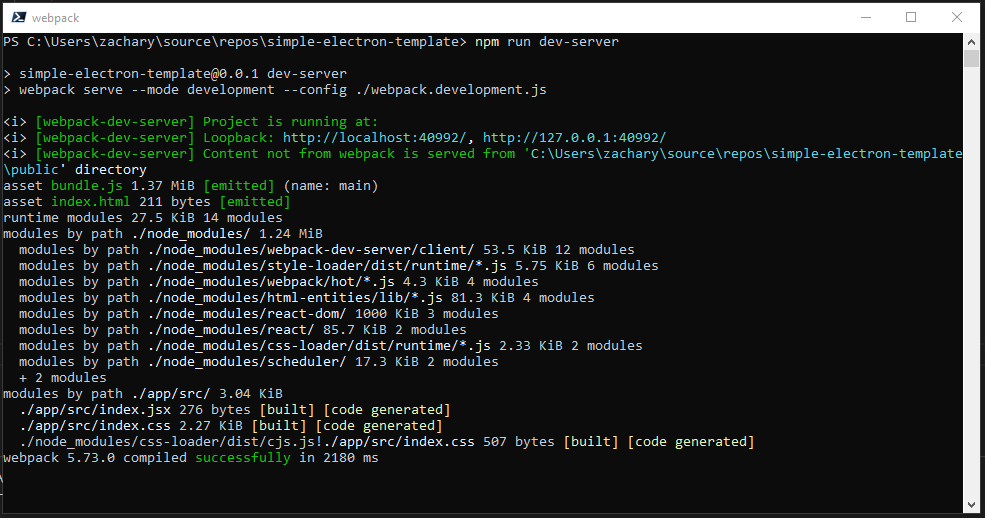
Running npm run dev and then electron . [in a separate console/terminal window] will now show our app running with the injected CSS.

Setting up the Webpack development server
You may be getting tired of running npm run dev and then electron . every single time we make a change, surely there must be better tooling for our development environment. We are fortunate that within the Webpack framework we have first-class support for our use case through webpack-dev-server. With the Webpack dev server, Webpack will watch our bundle for any changes and recompile the changes on the fly without us needing to run Webpack for every front-end change that we make.
The Webpack dev server works by hosting a local webserver where we can point our application to use; the bundled files Webpack creates will be updated on the fly when changes are made.
Install the webpack-dev-server by running the command:
PS C:\Users\zachary\source\repos\simple-electron-template> npm i webpack-dev-server --save-devInstalling the webpack dev server
The Webpack dev server works by looking at the "devServer" property in our Webpack config, so let's add it and some values that make sense for our application.
const HtmlWebpackPlugin = require("html-webpack-plugin");
const path = require("path");

module.exports = {
    entry: "./app/src/index.jsx",
    output: {
        path: path.resolve(__dirname, "app/dist"),
        filename: "bundle.js"
    },
    devServer: {
        host: "localhost",
        port: "40992"
    },
    module: {
        rules: [
            // loads .js/jsx/json files
            {
                test: /\.jsx?$/,
                include: [path.resolve(__dirname, "app/src")],
                loader: "babel-loader",
                resolve: {
                    extensions: [".js", ".jsx", ".json"]
                }
            },
            {
                // loads .html files
                test: /\.(html)$/,
                include: [path.resolve(__dirname, "app/src")],
                use: {
                    loader: "html-loader"
                }
            },
            {
                // loads .css files
                test: /\.css$/,
                include: [path.resolve(__dirname, "app/src")],
                use: [
                    "style-loader",
                    "css-loader"
                ]
            }
        ]
    },
    plugins: [
        new HtmlWebpackPlugin({
            template: path.resolve(__dirname, "app/src/index.html"),
            filename: "index.html"
        })
    ]
};
Adding configuration for the Webpack dev server
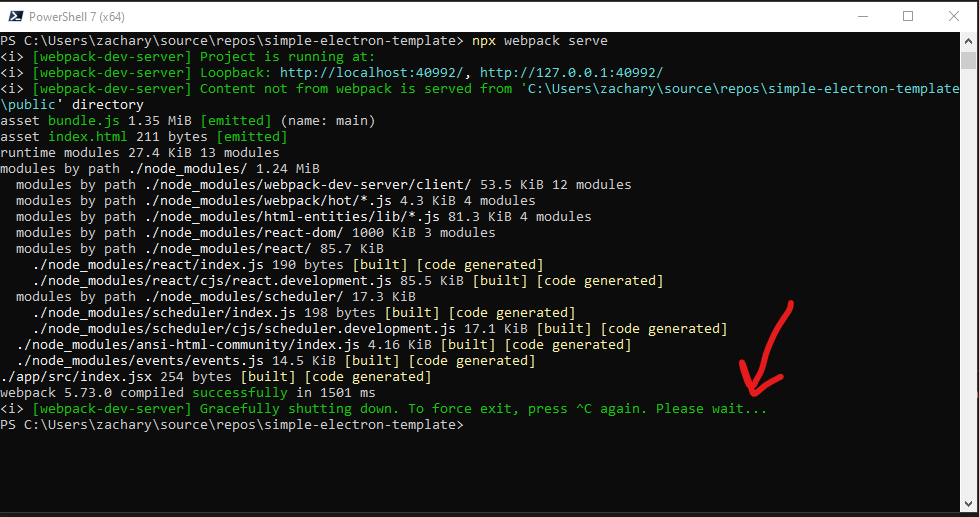
If we run npx webpack serve, the Webpack dev server is spun up. Our files will be hosted at http://localhost:40992. Opening up a new web browser window and navigating to http://localhost:40992/ will show our app! Unfortunately, we have an error we will see if we try to view this URL in our web browser.
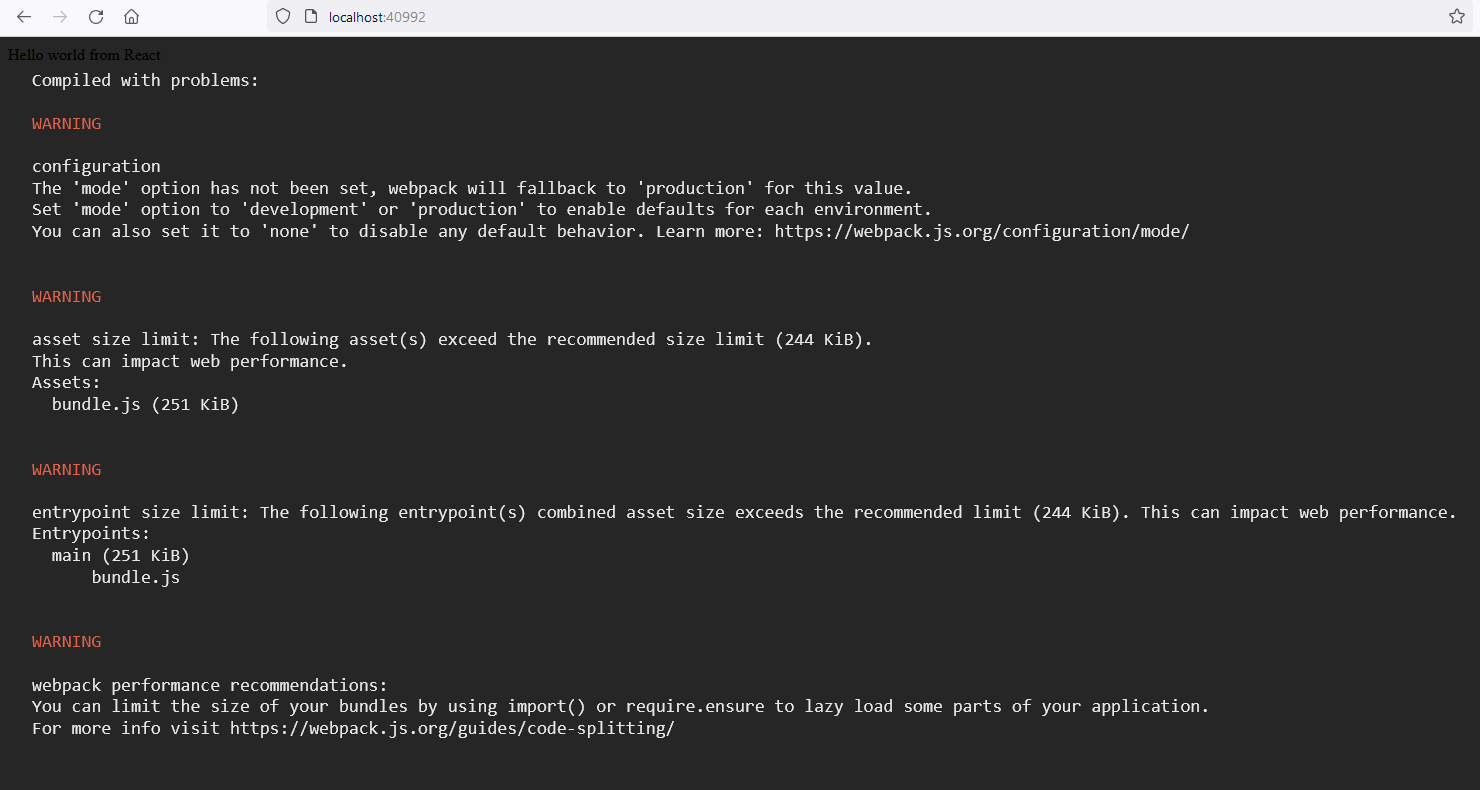
It is a good time to introduce the "mode" property of Webpack. Defining the mode for Webpack makes changes that are specific for a given environment. The mode of "production" sets some optimization defaults that you wouldn't necessarily want while developing your application. By default if no mode is provided, Webpack assumes "production" is the mode. Let's update our webpack.config.js with the mode as "development" as the shown error is requiring that we set a "mode" option in our Webpack config file.
const HtmlWebpackPlugin = require("html-webpack-plugin");
const path = require("path");

module.exports = {
    mode: "development",
    entry: "./app/src/index.jsx",
    // .. rest of config
};
Setting the mode of Webpack to "development"
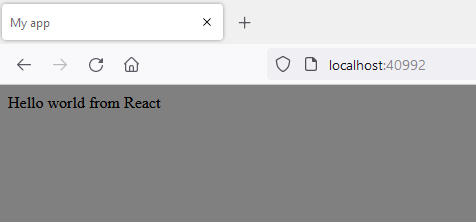
Run npx webpack serve again, and re-visit http://localhost:40992 in your web browser. You should have no errors and see our application successfully!
Are you stuck? Is npx webpack serve still running? This command is long-running, that is, the command will not stop unless you terminate it. You can use ctrl + c or command + c in order to stop the process in the terminal.
We have an additional change to make in our main.js file if we are using the Webpack development server. We can no longer loadFile, but instead must loadURL as our bundled assets are being hosted by Webpack at http://localhost:40992/.
main.js
const {
    app,
    BrowserWindow
} = require("electron");

function createWindow() {
    // Create a new window
    const window = new BrowserWindow({
        width: 800,
        height: 600,
        show: false
    });

    // Event listeners on the window
    window.webContents.on("did-finish-load", () => {
        window.show();
        window.focus();
    });

    // Load our HTML file
    //window.loadFile("app/dist/index.html");
    window.loadURL("http://localhost:40992");
}

// This method is called when Electron
// has finished initializing
app.whenReady().then(() => {
    createWindow();

    app.on("activate", () => {
        // On macOS it's common to re-create a window in the app when the
        // dock icon is clicked and there are no other windows open.
        if (BrowserWindow.getAllWindows().length === 0) {
            createWindow();
        }
    });
});

// Quit when all windows are closed, except on macOS. There, it's common
// for applications and their menu bar to stay active until the user quits
// explicitly with Cmd + Q.
app.on("window-all-closed", function () {
    if (process.platform !== "darwin") {
        app.quit();
    }
});
We need to loadURL instead of loadFile if we are using the Webpack dev server
By running npx webpack serve and electron ., our application loads successfully with Webpack dev server.

Supporting multiple Webpack configurations
If we are intending to build the most-optimal app, we want to build our app for separate configurations. An app that we distribute shouldn't have the Webpack dev server enabled; we need a way to configure Webpack between our development and production builds.
There exists a package named webpack-merge that will enable us to support Webpack in the development and production environments. Using this package will allow us to define a base configuration file, and environment specific files for development and production. Add two new files, webpack.development.js and webpack.production.js. Install webpack-merge with the following command npm i webpack-merge --save-dev.
Add the following code to webpack.development.js.
webpack.development.js
const {
    merge
} = require("webpack-merge");
const base = require("./webpack.config.js");

module.exports = merge(base, {
    mode: "development",
    devServer: {
        host: "localhost",
        port: "40992"
    }
});
Our development-specific settings
Remove the "mode" and "devServer" property from webpack.config.js.
webpack.config.js
const HtmlWebpackPlugin = require("html-webpack-plugin");
const path = require("path");

module.exports = {
    entry: "./app/src/index.jsx",
    output: {
        path: path.resolve(__dirname, "app/dist"),
        filename: "bundle.js"
    },
    module: {
        rules: [
            // loads .js/jsx/json files
            {
                test: /\.jsx?$/,
                include: [path.resolve(__dirname, "app/src")],
                loader: "babel-loader",
                resolve: {
                    extensions: [".js", ".jsx", ".json"]
                }
            },
            {
                // loads .html files
                test: /\.(html)$/,
                include: [path.resolve(__dirname, "app/src")],
                use: {
                    loader: "html-loader"
                }
            },
            {
                // loads .css files
                test: /\.css$/,
                include: [path.resolve(__dirname, "app/src")],
                use: [
                    "style-loader",
                    "css-loader"
                ]
            }
        ]
    },
    plugins: [
        new HtmlWebpackPlugin({
            template: path.resolve(__dirname, "app/src/index.html"),
            filename: "index.html"
        })
    ]
};
Our webpack config with values removed that are specific to the development environment
Now, since we want to use webpack.development.js instead of webpack.config.js, we need to pass in a --config option when we run webpack serve. Run the following two commands: npx webpack serve --config ./webpack.development.js followed by electron .. We should see our app open up as before!
Adding a production configuration
Our production configuration file should take advantage of enabling optimizations and turning off features that compromise security that don't make sense while developing. In the webpack.production.js, add the following code.
const {
    merge
} = require("webpack-merge");
const base = require("./webpack.config.js");

module.exports = merge(base, {
    mode: "production",
    devtool: false,
    optimization: {
        minimize: true
    }
});
A production Webpack configuration file
We will turn off the devtool property which, contrary to the functionality you would think this property controls, turns off source mappings which not only serves less files, but makes it harder for others to look at the source code of our application. We also set the minimize option so that we minify our bundled output.
If we were to try to test our production configuration at this point, we wouldn't be able to successfully validate our changes working. Our main.js is currently hardcoding that we load our Electron app from "http://localhost:40992", and since in production we do not have a development server enabled, nothing would load in our application if we loaded our production Webpack configuration file.
app/electron/main.js
// Load our HTML file
//window.loadFile("app/dist/index.html");
window.loadURL("http://localhost:40992");
We've currently hardcoded how our Electron app loads the main HTML file
We need a way to branch our logic to load the development server if we are developing our application, or the HTML file if we are loading our application in production mode. There are multiple ways we can approach coding branching logic in our main file, but we will move forward with using environment variables in order to accomplish this.
Electron supports Windows, Mac or Linux operating systems, and depending on the operating system you are developing in, environment variables are set differently. On Mac and Linux, environment variables are set like this: export variable=value. On Windows, environment variables are set like this: $env:variable = 'value'. It would obviously be a hassle to type different commands depending on the operating system you are developing in. Fortunately, there is a package named cross-env that allows you to define environment variables in one syntax that are set properly in any of these three operating systems. Install cross-env with the following command: npm i cross-env --save-dev.
Environment variables are set with cross-env with the following syntax: cross-env variable=value (most similar to Mac/Linux operating systems). When an environment variable is set, the Node process will be able to inspect this value and we can branch our code. The name of the environment variable is unimportant, but for reasons explained shortly, let's use the name "NODE_ENV" as our environment variable name. Make the following changes to main.js to pull the value of "NODE_ENV" and load the app correctly per environment.
app/electron/main.js
const {
    app,
    BrowserWindow
} = require("electron");
const isDevelopment = process.env.NODE_ENV === "development";

function createWindow() {
    // Create a new window
    const window = new BrowserWindow({
        width: 800,
        height: 600,
        show: false
    });

    // Event listeners on the window
    window.webContents.on("did-finish-load", () => {
        window.show();
        window.focus();
    });

    // Load our HTML file
    if (isDevelopment) {
        window.loadURL("http://localhost:40992");
    } else {
        window.loadFile("app/dist/index.html");
    }
}

// This method is called when Electron
// has finished initializing
app.whenReady().then(() => {
    createWindow();

    app.on("activate", () => {
        // On macOS it's common to re-create a window in the app when the
        // dock icon is clicked and there are no other windows open.
        if (BrowserWindow.getAllWindows().length === 0) {
            createWindow();
        }
    });
});

// Quit when all windows are closed, except on macOS. There, it's common
// for applications and their menu bar to stay active until the user quits
// explicitly with Cmd + Q.
app.on("window-all-closed", function () {
    if (process.platform !== "darwin") {
        app.quit();
    }
});
Our entry point for our application is different based on the environment our app is running in
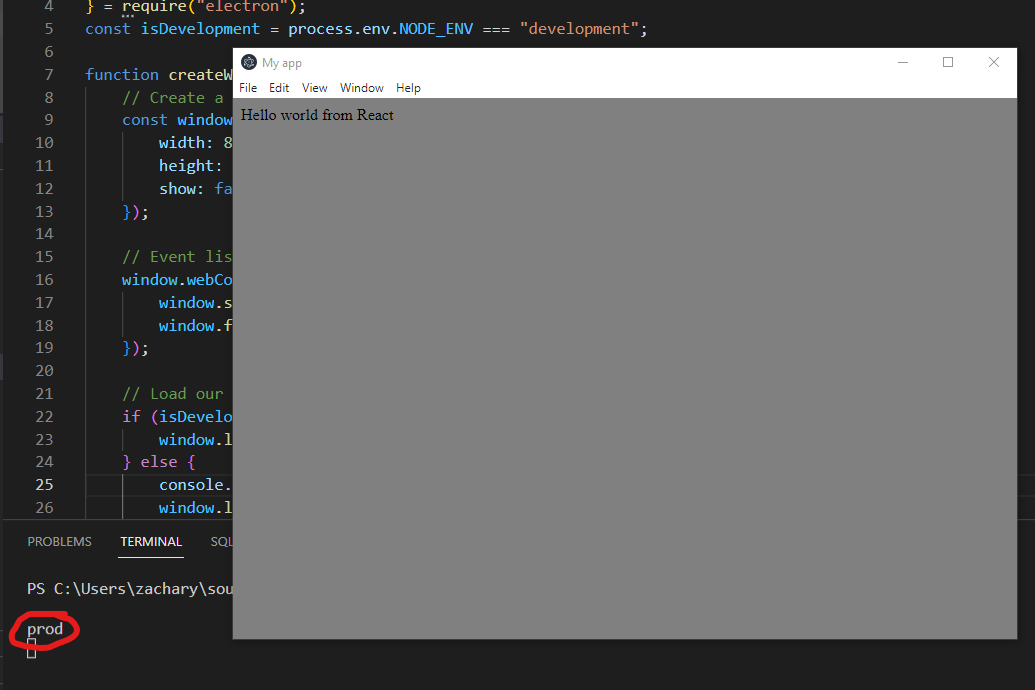
Run the following command to build our Webpack bundle with the production configuration file: npx webpack --config ./webpack.production.js. Then run our application but defining the NODE_ENV environment variable: npx cross-env NODE_ENV=production electron .. Our app should start as before. Just to be sure let's add a small console message to be confident we are loading our application correctly with the production config.
app/electron/main.js
// Load our HTML file
if (isDevelopment) {
    window.loadURL("http://localhost:40992");
} else {
    console.log("prod");
    window.loadFile("app/dist/index.html");
}
Adding a console message to print when we run our application in a production configuration
Run npx cross-env NODE_ENV=production electron . again to confirm our changes work as expected.
Leveraging package.json scripts
We've typed the commands to build and run our application too many times, and we'd do us a disservice if we didn't put these scripts in our package.json. Let's make changes and add our commands so we can run these commands with less typing.
package.json
{
  "name": "simple-electron-template",
  "version": "0.0.1",
  "description": "",
  "main": "app/electron/main.js",
  "private": true,
  "directories": {
    "doc": "docs",
    "test": "test"
  },
  "devDependencies": {
    "babel-loader": "^8.2.5",
    "cross-env": "^7.0.3",
    "electron": "^19.0.8",
    "html-loader": "^4.1.0",
    "html-webpack-plugin": "^5.5.0",
    "webpack": "^5.73.0",
    "webpack-cli": "^4.10.0",
    "webpack-dev-server": "^4.9.3",
    "webpack-merge": "^5.8.0"
  },
  "scripts": {
    "dev-server": "webpack serve --mode development --config ./webpack.development.js",
    "dev": "cross-env NODE_ENV=development electron .",
    "preprod": "webpack --mode production --config ./webpack.production.js",
    "prod": "cross-env NODE_ENV=production electron ."
  },
  "keywords": [],
  "author": "",
  "license": "ISC",
  "dependencies": {
    "@babel/core": "^7.18.6",
    "@babel/preset-env": "^7.18.6",
    "@babel/preset-react": "^7.18.6",
    "react": "^18.2.0",
    "react-dom": "^18.2.0"
  }
}
We've moved our scripts into the package.json
Running our app in development mode will require us to run npm run dev-server, followed by npm run dev in a separate window. Running our app in production mode will only require us to run npm run prod.
Supporting distributables
An app isn't as useful if it cannot be shared. There are a number of different packages that support creating release distributables for Electron apps, but we will be choosing electron-builder. Install electron-builder by running the following command npm i electron-builder --save-dev.
After this package is installed, we will need to make a number of changes in our package.json file.
- The name, description, version and author fields need to be populated.
- The build field needs to be populated.
- Icons should be added to your project (which corresponds to the build.directories.buildResources property). Sample files can be downloaded here.
- The pack, dist and postinstall scripts need to be set.
- Remove the pre-existing directories field.
Let's view our modified package.json after the abovementioned changes.
package.json
{
  "name": "simple-electron-template",
  "version": "0.0.1",
  "description": "My Electron application",
  "main": "app/electron/main.js",
  "private": true,
  "devDependencies": {
    "babel-loader": "^8.2.5",
    "cross-env": "^7.0.3",
    "css-loader": "^6.7.1",
    "electron": "^19.0.8",
    "electron-builder": "^23.1.0",
    "html-loader": "^4.1.0",
    "html-webpack-plugin": "^5.5.0",
    "style-loader": "^3.3.1",
    "webpack": "^5.73.0",
    "webpack-cli": "^4.10.0",
    "webpack-dev-server": "^4.9.3",
    "webpack-merge": "^5.8.0"
  },
  "scripts": {
    "dev-server": "webpack serve --mode development --config ./webpack.development.js",
    "dev": "cross-env NODE_ENV=development electron .",
    "preprod": "webpack --mode production --config ./webpack.production.js",
    "prod": "cross-env NODE_ENV=production electron .",
    "postinstall": "electron-builder install-app-deps",
    "pack": "electron-builder --dir",
    "dist": "electron-builder"
  },
  "build": {
    "productName": "MyProductName",
    "appId": "com.mycompany|electron.myproductname",
    "directories": {
        "buildResources": "resources"
    },
    "win": {
        "target": [
            "nsis",
            "msi"
        ]
    },
    "linux": {
        "target": [
            "deb",
            "rpm",
            "snap",
            "AppImage"
        ]
    }
  },
  "keywords": [],
  "author": "Me",
  "license": "ISC",
  "dependencies": {
    "@babel/core": "^7.18.6",
    "@babel/preset-env": "^7.18.6",
    "@babel/preset-react": "^7.18.6",
    "react": "^18.2.0",
    "react-dom": "^18.2.0"
  }
}
An updated package.json that supports distributing the Electron app
Running npm run dist will create a distributable for your application.
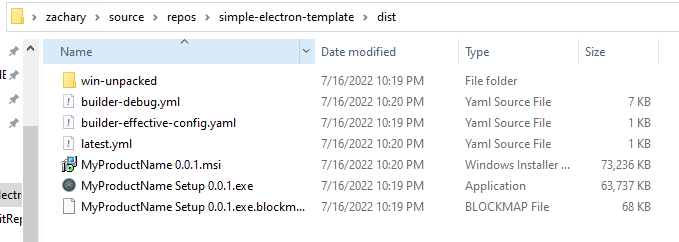
If we want to target a specific operating system, we can pass in any one of these flags --mac , --linux or --windows . It is helpful to create additional npm scripts in order that we can create distributables more easily.
package.json
{
  "name": "simple-electron-template",
  "version": "0.0.1",
  "description": "My Electron application",
  "main": "app/electron/main.js",
  "private": true,
  "devDependencies": {
    "babel-loader": "^8.2.5",
    "cross-env": "^7.0.3",
    "css-loader": "^6.7.1",
    "electron": "^19.0.8",
    "electron-builder": "^23.1.0",
    "html-loader": "^4.1.0",
    "html-webpack-plugin": "^5.5.0",
    "style-loader": "^3.3.1",
    "webpack": "^5.73.0",
    "webpack-cli": "^4.10.0",
    "webpack-dev-server": "^4.9.3",
    "webpack-merge": "^5.8.0"
  },
  "scripts": {
    "dev-server": "webpack serve --mode development --config ./webpack.development.js",
    "dev": "cross-env NODE_ENV=development electron .",
    "preprod": "webpack --mode production --config ./webpack.production.js",
    "prod": "cross-env NODE_ENV=production electron .",
    "postinstall": "electron-builder install-app-deps",
    "pack": "electron-builder --dir",
    "dist": "electron-builder",
    "dist-mac": "electron-builder --mac",
    "dist-linux": "electron-builder --linux",
    "dist-windows": "electron-builder --windows"
  },
  "build": {
    "productName": "MyProductName",
    "appId": "com.mycompany|electron.myproductname",
    "directories": {
        "buildResources": "resources"
    },
    "win": {
        "target": [
            "nsis",
            "msi"
        ]
    },
    "linux": {
        "target": [
            "deb",
            "rpm",
            "snap",
            "AppImage"
        ]
    }
  },
  "keywords": [],
  "author": "Me",
  "license": "ISC",
  "dependencies": {
    "@babel/core": "^7.18.6",
    "@babel/preset-env": "^7.18.6",
    "@babel/preset-react": "^7.18.6",
    "react": "^18.2.0",
    "react-dom": "^18.2.0"
  }
}
npm run dist-linux will create a distributable for Linux, npm run dist-mac will create a distributable for Mac and npm run dist-windows will create a distributable for Windows.
Since we have the following code in our main.js file, when our app is running in production (ie. when the application's distributable has been produced by electron-builder), our app will be loading the production-bundled version of our scripts.
// Load our HTML file
if (isDevelopment) {
    window.loadURL("http://localhost:40992");
} else {
    window.loadFile("app/dist/index.html");
}
Our main.js code that loads a different entry point if we are in development or not
It's important that before we create a distributable of our app, that we create a new production-bundled script. Modify the npm scripts to reflect the changes below. These changes will first execute webpack to compile the scripts before a distributable is created.
package.json
{
  "name": "simple-electron-template",
  "version": "0.0.1",
  "description": "My Electron application",
  "main": "app/electron/main.js",
  "private": true,
  "devDependencies": {
    "babel-loader": "^8.2.5",
    "cross-env": "^7.0.3",
    "css-loader": "^6.7.1",
    "electron": "^19.0.8",
    "electron-builder": "^23.1.0",
    "html-loader": "^4.1.0",
    "html-webpack-plugin": "^5.5.0",
    "style-loader": "^3.3.1",
    "webpack": "^5.73.0",
    "webpack-cli": "^4.10.0",
    "webpack-dev-server": "^4.9.3",
    "webpack-merge": "^5.8.0"
  },
  "scripts": {
    "dev-server": "webpack serve --mode development --config ./webpack.development.js",
    "dev": "cross-env NODE_ENV=development electron .",
    "preprod": "webpack --mode production --config ./webpack.production.js",
    "prod": "cross-env NODE_ENV=production electron .",
    "postinstall": "electron-builder install-app-deps",
    "pack": "electron-builder --dir",
    "dist": "npm run preprod && electron-builder",
    "dist-mac": "npm run preprod && electron-builder --mac",
    "dist-linux": "npm run preprod && electron-builder --linux",
    "dist-windows": "npm run preprod && electron-builder --windows"
  },
  "build": {
    "productName": "MyProductName",
    "appId": "com.mycompany|electron.myproductname",
    "directories": {
        "buildResources": "resources"
    },
    "win": {
        "target": [
            "nsis",
            "msi"
        ]
    },
    "linux": {
        "target": [
            "deb",
            "rpm",
            "snap",
            "AppImage"
        ]
    }
  },
  "keywords": [],
  "author": "Me",
  "license": "ISC",
  "dependencies": {
    "@babel/core": "^7.18.6",
    "@babel/preset-env": "^7.18.6",
    "@babel/preset-react": "^7.18.6",
    "react": "^18.2.0",
    "react-dom": "^18.2.0"
  }
}
Re-build the production scripts before creating release distributables
We've finished our app
Now, there is certainly much more that we can add to build our app, but following these steps will start us off on a good foot. The template is available on Github at the simple-electron-template repository.
If you're looking for more of a "kitchen sink" repository that builds upon the features this guide has walked us through (plus many others), I encourage you to visit secure-electron-template .